Dandeman Dan's Toy Page
Toyota 4Runner & Ham Radio Interests
|

Bolt on Rock Slider/Frame Cradle Project
Design Goals
This mounting approach incorporates a frame cradle design to mount the rock slider/nerf bars and achieve the following goals:
- Distribute the load over a larger area of the frame
- Solves the unique challenges presented by the third gen 4Runner design. The difficult areas are:
- Unless you have a body lift, the top of frame to body floor clearance is very tight, typically no more than 1/4" in many places.
- On the left side of the vehicle, the gas tank prevents access to the back side of the frame from forward of the rear wheel to about midway up the rocker panel. Unless you drop the gas tank, frame bolt through or frame clamping from the back side is not possible.
- No frame welding or additional holes in frame required since the cradle shape grips around the frame and uses existing frame through holes.
- Ties into the rear suspension link mounting point to offer protection to that vulnerable area.
- The frame cradle/rock slider solution can be installed or removed in about two hours if necessary for vehicle repairs.
Construction Considerations
Key to this design is a snug fit on the frame by the "C" sections shown below, yet with sufficient clearance left to allow the cradle to slide on to and off the frame. This is easier said than done. You need to be, or have a skilled, experienced welder construct this design due to the following:
- To achieve the proper fit, this design must be "tacked" together using the vehicle and frame as the construction fixture or "jig". Needless to say, on vehicle welding requires care and skill due to avoid damage and risk of fire. The use of an auto darkening welding helmet, remote welder power control, a water hose at your side, and attention to where your welding rod is at all times, is highly recommended.
- With the amount of computer technology on board, it is highly recommended that you disconnect the battery before welding around the vehicle. This is especially important if your vehicle contains air bags (and seat belt pretensioners). Per the Toyota collision damage repair manual, disconnect the battery at least a minimum of 90 seconds before beginning any electric welding. The delay is necessary to allow time for the air bag back up energy storage system to fully discharge.
- You must use clearance shims when tacking together the "C" shape portion of the cradle due to the following. When tacking pieces together using the vehicle frame as the fixture, relatively little heat is being applied to the overall assembly. However, when the assembly is pulled off the vehicle and full heat is applied during the complete weld up, the steel tends to shrink down the clearances you originally had while tacking it together. To compensate for this, I laid 1/16" thick strips of metal on top of the frame to raise the upper piece of angle iron slightly off the frame before clamping and tacking together the pieces that make up the "C" section. Some of this clearance will also be used by the POR-15 coating which is extremely hard and it won't simply scrape off as you try to reinstall the bars. Forget this little detail and your new bars will not go back on the vehicle!
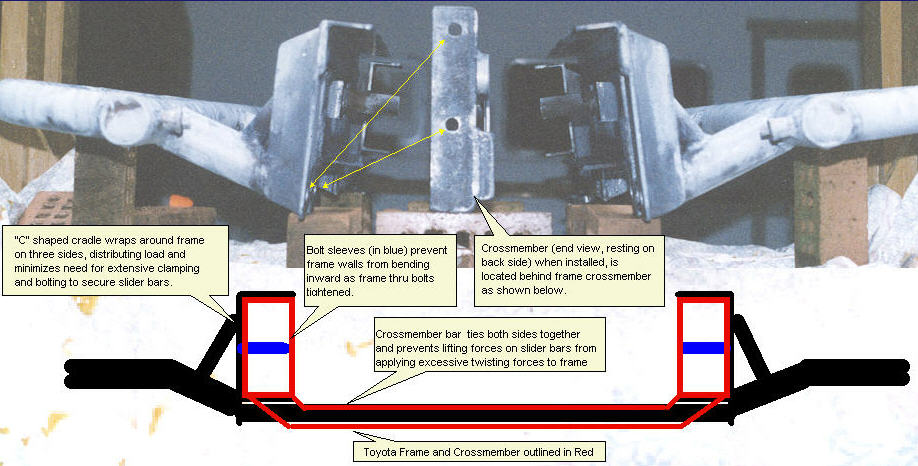
Below is a photograph of the frame cradle bars along with a diagram to show how the pieces mate together when installed on the vehicle frame. The yellow arrows pointing to the bolt holes shows how the cradle cross member mates up to the left and right cradle sub assemblies.
Cradle Construction Detail
Click on image below for additional construction detail.
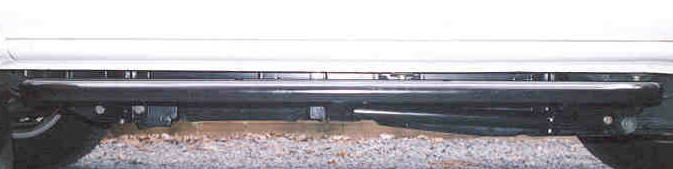
View of the bars installed
